Different from the X-axis and Y-axis motors, each Z-axis motor has an additional Z coupler, which connects the motor shaft to the threaded rod. Once the motor is powered on, it makes the shaft rotate, which in turn drives the threaded rod to rotate as well, so as to control the print head up and down. Generally, issues such as Z wobble and Z banding occur when there is a problem with the Z-axis motor, thus you need to check your motor first. If it is faulty, it needs to be replaced to ensure high-quality 3D prints. This article will be about how to replace Z-axis stepper motors for Anycubic Kobra Series 3D printer.
You should note that this tutorial is specific to Anycubic Kobra Series 3D printers. However, the replacement of the motor may not be 100% consistent for each model in the seires, and there would be little differences. For example, some models have integrated motors and pulleys, while others have separate ones. In general, the overall steps are similar across the Kobra Series models.
Related Motor Replacement Guides:
- How to replace Y-axis stepper motors
- How to replace X-axis stepper motors
- How to check and test a stepper motor
- Top 8 low-cost maintenance tips for FDM 3D printers
Tools You Need:

- Alan keys
- New Z-axis motor*1
Before changing your printer's Z motor, make sure to turn off your machine and remove the filament to ensure safety.
Step 1: Loosen Z coupler.

The Z coupler has two screws on its upper and lower surfaces, which secure the motor shaft and Z rod respectively. By loosening the screws, the Z coupler and Z rod can be detached from the Z-axis.
Step 2: Remove motor from Z-axis.

To successfully remove the Z motor from the Z-axis, you need to loosen the screws on the Z-motor bracket with an Allen key, and don't forget to unplug the motor cable. However, for large-format 3D printers like Kobra Max and Kobra Plus, it is typically necessary to have dual Z rods and dual motors to ensure print stability. In this step of removing the motor from the Z-axis, start by loosening the two knobs on the top frame first, in this way, you can unscrew the two pulleys. Next, release the belts connected to the two Z-threaded rods. Finally, remove the bracket and cable to take out the two motors.
Step 3: Install a new Z motor.

Transfer the bracket from the old motor to the new one and fix it to the Z-axis by tightening the screws. Then, plug the cable into the new motor. Before tightening the coupler, it is important to align the motor shaft and Z rod properly to avoid any negative impact on print quality.
Step 4: Make a test for your 3D printer.
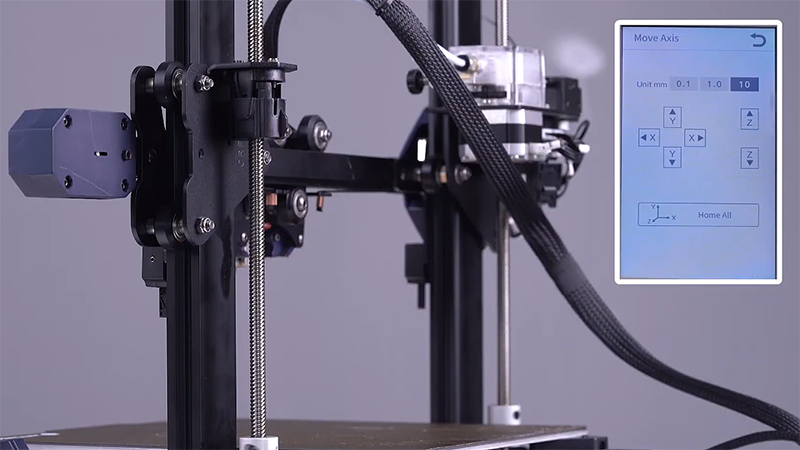
Conducting a simple test after a replacement is necessary, whatever components you replace in your printer. After replacing the Z-axis motor, use the printer display to control the print head to move up and down in order to verify if it is functioning correctly.