As the flagship of fast printer, assembling Anycubic Kobra 2 Max is not as challenging as one might think. In fact, it is an easy and enjoyable process, thanks to its modular design, which allows you to quickly put together this large machine. This article provides a step-by-step guide for unboxing, assembling, and testing.
Step-By-Step Assembly Guide for Anycubic Kobra 2 Max
Step 1 - Unbox Anycubic Kobra 2 Max.

Grip the tracks on both sides of the Kobra 2 Max base to take it out of the box. And don't forget there are also accessory parts and kits. Then, remove all protective foam from the machines. More importantly, ensure that the black foam beneath the printer's heated bed also should be removed.
Step 2 - Assemble printer frame.

For stable transportation, the gantry frame of the printer is secured on both sides of the heated bed with 4 fixing plates. Use the M3.0 hex key to remove the fixing plates under the bed, allowing the frame to be separated from the base and secured on both sides using a hex key and screws. Due to the giant Kobra 2 Max, it is also necessary to install two metal brackets that connect the top frame to the bottom frame to support its stability during printing.
Step 3 - Install print head.

After cutting off the nylon ties on the top frame, pull the belt on the top to lower the X-axis for easier installation of the print head. When the print head is securely on the X-carriage, gently shake it to check for any wobbling; slide it side to side to check for smoothness. You can use a wrench to tighten the three metal wheels' eccentric nuts until the movement is smooth without any wobbling. This adjustment applies similarly to the wheels under the heated bed.
Step 4 - Install and tighten belt tensioners.

The Kobra 2 Max is equipped with three belt tensioners on both the X and Z-axes, providing users with the convenience of adjusting the tension. After tightening all the knobs fully in a clockwise direction, loosen them by one turn to achieve the optimal belt tension.
Step 5 - Install touchscreen.

Secure the touch screen to the right side of the machine using an angle bracket, and then connect the ribbon cable to the back of the screen.
Step 6 - Install filament holder.

Assemble three parts into a filament rack, and then use a hex key to secure the rack to the bottom of the left Z-axis.
Step 7 - Install filament run-out detector.

Mount the filament sensor on the left frame, and attach the PTFE tube to the machine.
Step 8 - Install WiFi antenna.

Fix the WiFi antenna on the front of the machine. It's important to note that during regular printing, do not install or remove it while the machine is powered on.
Step 9 - Connect all cable connectors.

This step involves connecting all the cables for various components, including the print head, X-Y-Z-axis motors, the PE, the limit switch, and the filament sensor. Ensure they are well-connected and not loose. Next, organize all the wires along with the PTFE tube, tying them together to make sure they do not block the movement of the print head and the bed during printing. Finally, before powering on, at the back of the machine, there is a voltage selection switch (230V and 115V) for you to choose the appropriate voltage setting according to your local voltage.
Self-Test on Anycubic Kobra 2 Max
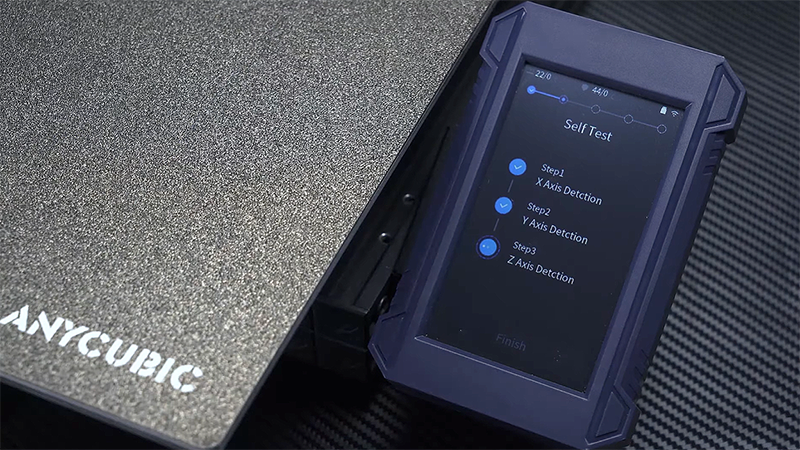
After assembling the printer, it's time to perform the initial setup. Before powering on the 3D printer, make sure that all hardware components are securely attached to the machine, and all cables are properly connected. Now, let's go to the initial configuration.
Before the automatic bed leveling process, the machine will execute self-test acts to detect the function of the Z, Y, and X-axis homing, ensuring stable printing results. It's pretty easy to maintain.
Auto Bed-Leveling on Anycubic Kobra 2 Max

When proceeding to the automatic bed leveling, the PEI sheet must be placed on the heated bed. This is because the sensor is designed for platforms with a metal surface. If you replace the print platform yourself, make sure to choose one with a metal surface to ensure the proper functioning of the automatic bed leveling feature.
Typically, in the automatic bed leveling, the machine performs three steps: first, preheat itself; then, it automatically cleans any filament residue and dust from the nozzle. Finally, the Z probe within the print head begins to detect the distance between the bed and the nozzle.
Load Filaments on Anycubic Kobra 2 Max

First, heat the printer to the appropriate temperature, and then feed the filament through your filament sensor. Continue to insert the filament into the white PTFE tube until you feel some resistance, indicating that the filament has reached the extruder. Press the extruder lever to feed the filament into the nozzle, and adjust the extruder tension if needed based on the situation. If you are unfamiliar with this step, I recommend you to read the guide on "How to Load and Unlaod Filaments" as well as "How to Calibrate Extruder Tension"
First Prints on Anycubic Kobra 2 Max

Once the filament and the machine are prepared, you can begin your first test print. Due to the 8GB built-in memory of the Kobra 2 Max, you can select a test file either from the printer's local storage or a USB drive, and no need for slicing before printing.
Observe the initial layer closely. If the nozzle scrapes or drags across the build plate, it indicates that the nozzle is too low. On the other hand, if you notice warping or unevenness in the first layer, the nozzle is too high. In both cases, you can re-calibrate the Z-offset to solve these issues.